Seaming 101
Seams provide clothing with structure and strength, bestowing finished garments with a professional, tailored appearance. They allow a sweater to hold its shape and look fresh after years of wear by avoiding the biasing and stretching that is often present in garments made without seams. Once you understand the component parts, seaming can become a simple and enjoyable task with skillful results as repeatable as the knit stitch itself.
Seaming Tools

~ A darning or tapestry needle with a blunt tip and large eye to thread yarn through easily
Tip: Some needles have a bent tip, which makes weaving your way under the legs of stitches even easier.
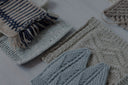
~ A few yards of firmly-spun seaming yarn in a matching color, of equal or lighter weight than your garment yarn* (Note: we’ve used a bright, contrasting color for our sample swatches to clearly illustrate the process of seaming.)
~ A measuring tape
~ Locking stitch markers or coiless safety pins
~ A sharp pair of thread/yarn snips
Preparing Pieces for Seaming

Once you have completed your knitting, wet block your finished pieces to the desired dimensions and let dry completely. This allows you to begin seaming with tidy selvedge stitches and flat fabric with matching measurements.
Tip: A selvedge stitch is akin to a fabric selvedge used in sewing: its purpose is to provide a stable edge to accept the seam. Generally, selvedges will be visible on the Wrong Side of the fabric once all the pieces are seamed together. (Visible selvedge stitches are occasionally exposed on the Right Side of a garment as a design feature.)
Pin basting your pieces will hold your seams in place as you sew, and can also be helpful when easing two edges of fabric together that are slightly different lengths, as often happens on armholes of a sweater with set-in sleeves. We recommend pin basting your pieces on a flat surface in a well-lit room. Working in this way produces far better results than seaming while seated with the pieces in your lap.

With Right Sides facing, align both fabric edges of your garment to be pin basted together, and, using your locking stitch markers or coiless safety pins, connect the pieces of knitting to each other.
Tip: As an alternative to using pins, you can thread contrasting colors of yarn through the stitches to be held together and loosely knot them, carefully cutting them out once your seaming is complete.
Where both pieces have the same stitch or row count, place pins at regular intervals — a minimum of one pin every three inches — and with more frequency on shaped or curved pieces of fabric to ease in extra fabric. As you seam, your pins will act as visual markers to ensure you are evenly distributing the fabric from both pieces as you work.
Side-to-Side Seaming

Side-to-side seaming, the most commonly used seaming technique, utilizes mattress stitch to join two pieces of mirroring fabric.
With a length of yarn at least 150% of the seam length, attach the yarn to the base of your seam: First, find the edge-most stitch and bring the yarn through to the front of the fabric and around the corresponding bar of the stitch on the other side. Then return to the first piece and draw your yarn through the first stitch once again, completing a figure eight shape. Tighten your join.

Now that the yarn is joined, begin seaming with mattress stitch. Find the bar between your selvedge stitch and its neighboring stitch column. Slip your tapestry needle under this bar on one side of the seam panel and out the top to the right side of the fabric, then do the same for the bar on the mirroring garment piece, coming back down to again enter underneath the bar and out above it. Continue sewing with this 1:1 stitch ratio until you reach the end of your seam.

As you work, tighten your seam stitches every inch or two, matching the tension of the knit fabric as closely as possible and taking care to not pull any of your seams too tightly, which can result in puckering.
Tip: If your sweater pattern does not provide a specific order for seaming, the following sequence is recommended: seam shoulders, set-in and seam armholes, finishing by seaming the side seams of body and underarm seams on sleeves.

Top-to-Top Seaming
 Align the bound-off edges of each piece with the Right Sides facing you. Starting at one side slide your needle under both legs of the first knit stitch, just underneath the bound-off edge. Then repeat the same motion on the first stitch on the mirroring side. Work back and forth in this manner along the seam.


Top-to-Side Seaming

Both methods discussed so far involve seaming together two edges of fabric at a precise 1:1 ratio — either stitch-to-stitch or row-to-row. When seaming top-to-side, you are joining fabric edges that do not have a 1:1 ratio due to the difference in stitch and row gauge in knitted fabric. Pin basting (discussed above) is the easiest way to join top and side edges in proper relationship to one another.

Starting with the top edge, slip your needle under both legs of the stitch below the bound-off top edge, then find the bar between your selvedge and its neighboring stitch on your side edge. Working from the Right Side of the fabric, slip your needle under the bar between each knit stitch and pull the yarn through. Continue working back and forth in this way, making sure that your fabric is laying flat at each marked reference point as you complete your seam.

Finishing
Once your pieces have been joined together, it’s time to polish your seams with a gentle steam. Hold a steam iron a short distance away from the seam and allow multiple shots of steam to relax the seam. If you do not have a steam iron, dampen a towel and drape it over the seam. Select the wool setting, and apply the iron lightly to the towel’s surface.
Caution: applying a hot iron directly to the surface of wool fabric can result in charred fibers or an undesirable sheen on the fabric.
After this final steam, weave in any remaining yarn ends invisibly on the Wrong Side of your garment, then wear proudly!

*If your sweater was knit with our woolen-spun yarns Loft, Shelter or Quarry, some knitters prefer to do their seaming with a firmly spun yarn in a similar color because of the softly spun nature of woolen-spun yarn; alternatively, you may add twist into the yarn (in the same direction as the yarn is plied) as you seam to add tensile strength.
Shop our Latest Patterns


Checkers

Cyro
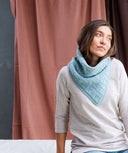
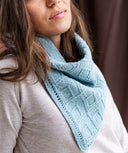
Diamants Cowl


Diamants Hat


Matches


Diverge


Grooves
Loomed