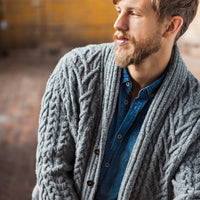
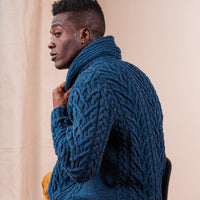
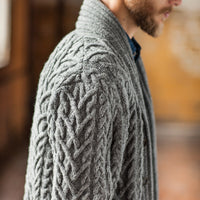
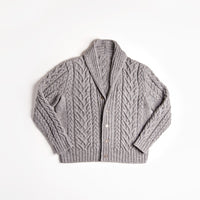
Product description

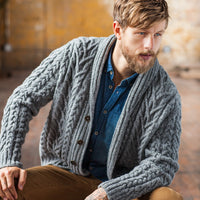
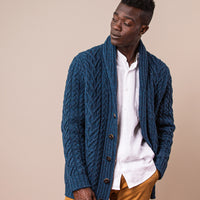
“I’ve had this cardigan on my 'to design' list for a couple of years. When our design team decided to put together a collection of menswear, I knew it was finally time to make the idea a reality!

Cabled cardigans are one of my most beloved wardrobe items. Their true timelessness makes them so versatile. I love combining them with all manner of outfits for instant coziness, either at home or on the road.” – Jared Flood

Designer: Jared Flood

Collections: Men Volume 1; BT Essentials


Share

Timberline

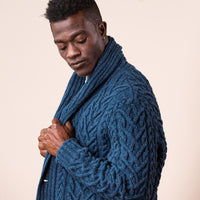
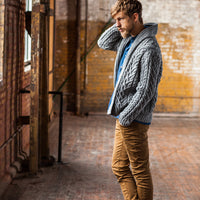
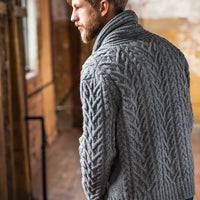
Shawl Collar Cabled Cardigan

Languages Available
  • English
  • French
  • German
  • Russian
  • Spanish
Skill Level 5 of 5
$12.00 (PDF) Regular price
Or
Complete Your Bundle
Timberline
$12.00
Shelter 2-ply Woolen-Spun Worsted Weight
$16.50 / 140 yards ($0.12/yd)
Subtotal:
$12.00
  • Product description

    “I’ve had this cardigan on my 'to design' list for a couple of years. When our design team decided to put together a collection of menswear, I knew it was finally time to make the idea a reality!

    Cabled cardigans are one of my most beloved wardrobe items. Their true timelessness makes them so versatile. I love combining them with all manner of outfits for instant coziness, either at home or on the road.” – Jared Flood

    Designer: Jared Flood

    Collections: Men Volume 1; BT Essentials


  • Pattern materials

    YARDAGE

    • Approximately 2045 (2280, 2600, 2820) yards of worsted weight wool yarn


    YARN

    • 15 (17, 19, 21) skeins of Brooklyn Tweed Shelter (100% American Targhee-Columbia wool; 140 yards/50g)
    • Photographed in color Sweatshirt
    • Photographed in color Almanac


  • Pattern specs

    CONSTRUCTION

    • Sleeves are worked circularly from cuff to underarm. After binding off the underarm stitches, the cap is worked flat.
    • Cardigan Body is worked in one piece for the ribbed hem. Upon completion of the hem, stitches for the front Button Bands are put on a holder to be worked later. The remaining cabled section of the Body is worked in one piece to the underarm.
    • After underarm stitches are bound off for the Body, both Fronts and Back are worked separately to the shoulders. V-neck shaping is worked on each Front.
    • Upon completion of the Body, you will return to your held Button Band stitches and work them separately. Button Bands are worked at a firmer gauge than the cabled portion of fabric. When bands reach the base of the V-neck shaping, you will begin working shaping for the shawl Collar.
    • The shawl Collar is shaped with short rows, seamed together at the Back neck with a Joinery Bind Off. The edge of the Collar is then sewn to the Back Neck edge of garment.


    FINISHED DIMENSIONS

    • 43¾ (47¾, 53, 57)” blocked garment at chest; buttoned
    • Sample in color Sweatshirt shown in size 47¾” with 7¾” positive ease on model
    • Sample in color Almanac shown in size 53" with 17" positive ease on model

    Need help picking a size? See our resource page on Selecting a Sweater Size 101.


    GAUGE

    • 31 stitches & 31¼ rows = 4″ measured over cable patterns from Charts with Size A needle(s), after blocking
    • 20 stitches & 31¼ rows = 4″ in reverse stockinette stitch, with Size A needle(s), after blocking
    • 9-Stitch braid motif from Charts measures 1¼” wide
    • 30-Stitch large cable motif from Charts measures 3¾” wide


    NEEDLES

    Size A (for Main Fabric):

    • One each 16″ and 40″ circular needles, and one set of DPNs* in size needed to obtain gauge.
    • Suggested Size: 4½ mm (US 7)


    Size B (for Ribbing): 

    • One each 16″ and 40″ circular needles and one set of DPNs* two sizes smaller than Size A needle(s). 
    • Suggested Size: 3¾ mm (US 5)


    Size C (for Tubular Cast On only): 

    • One each 16″ and 40″ circular needles and one set of DPNs* three sizes smaller than Size A needle(s).
    • Suggested Size: 3½ mm (US 4)


    *32” circular needle can be used instead of 16″ circular needle and DPNs if using Magic Loop Method for working small circumferences in the round


    Please note: the stitch patterns in this garment are charted only.
  • Pattern Updates

    18 April 2017: Version 3.1

    On page 13, the last paragraph of Left Collar Shaping Sequence B should read: 

    Upon completion of this section, you will have worked Left Collar Shaping Sequence B 14 times; you now have 57 stitches on your needle.


    23 January 2014: Version 3.0

    On page 13, under Left Collar Shaping Sequence B, the first 3 stitches have been corrected to read: 

    “Collar Row B2 (WS): Knit 3, purl 1, knit 2, slip marker, work in established rib to next marker, slip marker, knit 2, purl 3.” 


    30 October 2013: Version 2.1

    The Sleeve cuff measurements were missing on the Schematic and have now been added. 


    28 August 2013: Version 2.0

    Page 6 Column 2 (end) adjusted as follows: 

    Work as established, repeating Hem Rows 1 & 2 until piece measures 2 1/2″ from cast-on edge, ending with a RS (WS, RS, WS) row.

    Sizes 43 3/4 and 53ʺ only:

    Place a marker at center of work [after 127 (–, 147, –) stitches]. 

    Next Row (WS): Work in established rib to 4 stitches before marker, p2tog, SSK, remove marker, k2tog, SSP, work in established rib to end. [4 stitches decreased; 250 (–, 290, –) stitches remain]

    Page 7 Column 1 (top), adjusted as follows: 

    All Sizes Resume: Divide Body and Bands 

    Body Setup Row 1 (RS): Knit 2, purl 1, slip 1 with yarn in back, *purl 2, knit 2; repeat from * 3 more times.

    Place the 20 stitches just worked onto waste yarn or a stitch holder (these are your Right Band stitches and will be worked later). Continue across row as follows: Work Row 1 of Right Front Setup Chart once (working increases as indicated), place marker (Marker A), purl 4 (5, 7, 9), M1P, purl 6 (16, 13, 28), M1P, [purl 2 (–, 7, –), M1P] 2 (–, 2, –) times, purl 0 (5, 0, 9), place marker (Marker B), work Row 1 of Back Setup Chart once (working the bracketed motif 3 times, and working increases as indicated), place marker (Marker C), purl 0 (5, 0, 9), [M1P, purl 2 (–, 7, –)] 2 (–, 2, –) times, M1P, purl 6 (16, 13, 28), M1P, purl 4 (5, 7, 9), place marker (Marker D), work Row 1 of Left Front Setup Chart once (working increases as indicated). Place the final 20 stitches of row onto waste yarn or a stitch holder (for Left Band). [40 stitches have been placed on hold; 19 (15, 19, 15) stitches have been increased; 229 (249, 269, 289) stitches now on needle. 
  • Share